
Setup & Adjustments
- Installation
- Lowering - Height Adjustablilty
- Assembly
Installation
This page will show you the simple method of installing Pivot Pegz onto your bike. Here is a link to a video by one of our customers showing the installation method: https://www.youtube.com/watch?v=y8zOi3fJ4QA
Mount Spring Fitment
The picture below shows the correct configuration for fitment of the left and right Mount Springs to all Pivot Pegz models.
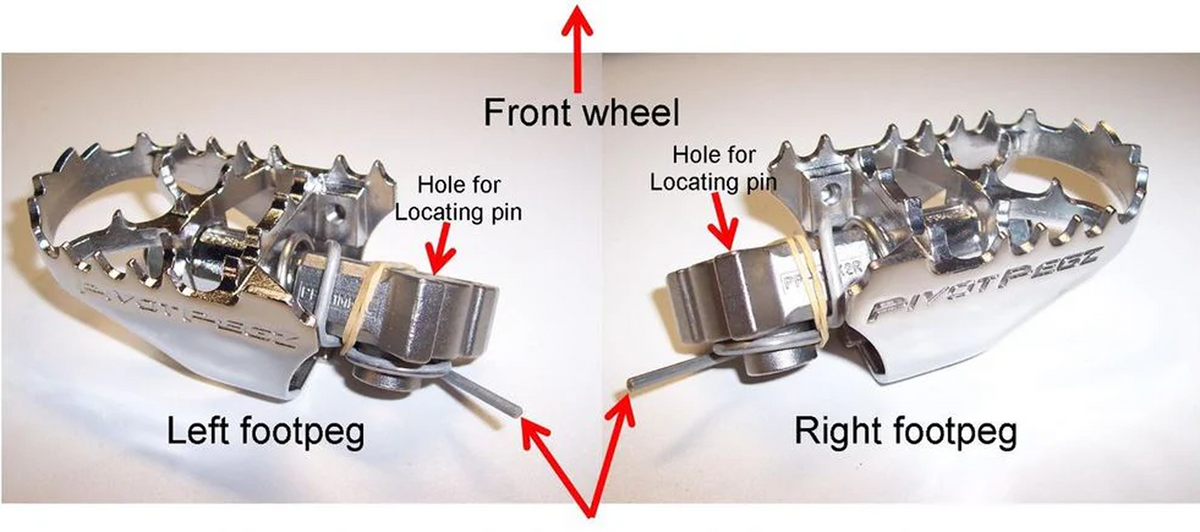
Note: The spring legs shown above are designed to lean against the motorcycle frame and are compressed when the pegs are moved into position and the pins are inserted. Special Note: The springs legs do not insert into the spring hole or groove in the frame bracket like some standard spring do, they lean against the back of the frame bracket instead - please view picture above and below. (Rubber bands are for display purposes only and are not to be fitted to the motorcycle
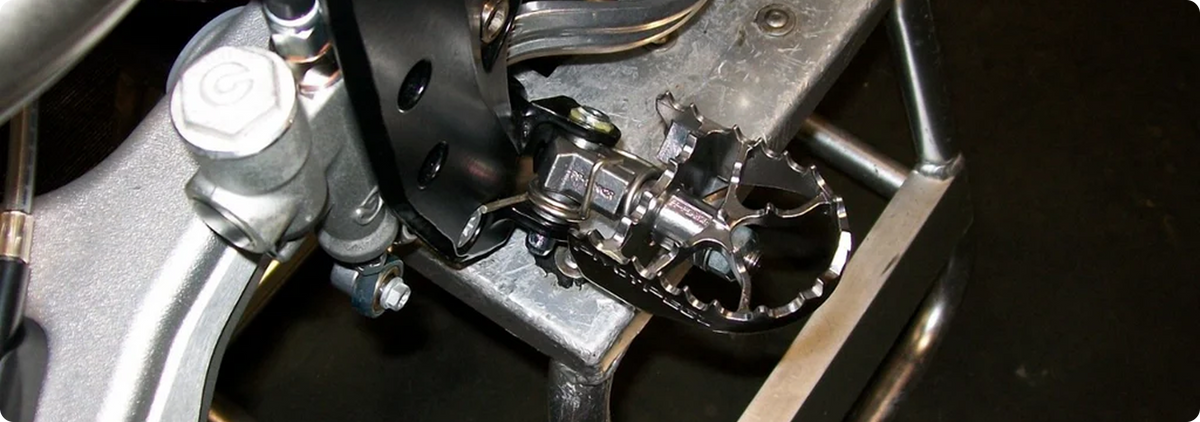
Below is another picture showing the Mount Springs installed onto a KTM. The Mount Spring installation method and position is the same on all bikes.
Lowering - Height Adjustablilty
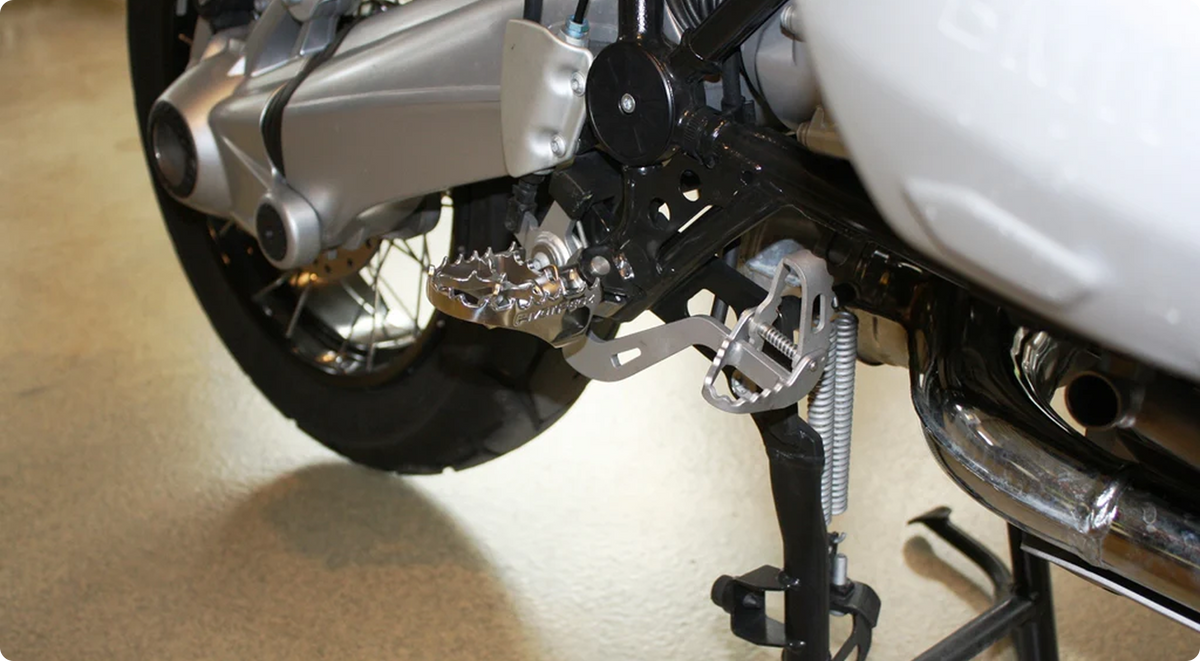
Picture of new BMW R1200GS with Pivot Pegz fitted
The lowering option of Pivot Pegz is available on most motorcycles simply by either interchanging the left and right Mount Assemblies OR by moving the spacer from the underside of the Mount to the topside of the Mount. The end result is that you can lower your Pivot Pegz by between 5 to 12mm. It's a simple task that takes around 10 minutes.
Lowering requires no modification and can be reverted back to standard, quickly and easily.
The lowering option and the method/technique of lowering the Pivot Pegz varies from bike to bike, please email us via our contact us page and we will send you information about if the lowering option is available for your bike.
Note: The pivoting nature of Pivot Pegz makes your riding position feel less cramped and gives a slightly lower stance even without lowering the Pivot Pegz. If the lowering option is available for your bike we recommend test riding your Pivot Pegz in the standard configuration first before lowering them as they may very well be perfect in the standard position. If after test riding you still need more room you can investigate the lowering option. Contact us for more information.
Assembly
This page contains information and instructions regarding the dis-assembly and re-assembly of Pivot Pegz. Whether you have MK2, MK3 or MK4 Pivot Pegz the method is still the same. See diagram and step-by-step instructions below.
(If you're looking for information regarding installation, maintenance and servicing click this link - Maintenance Page).
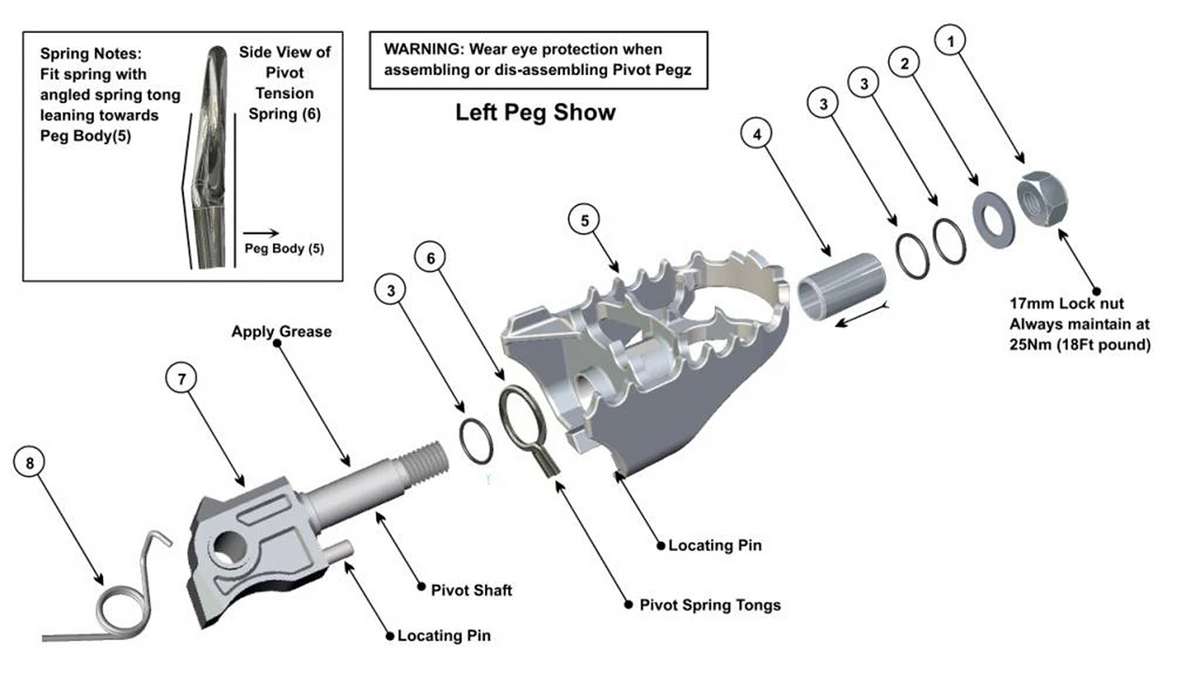
Referring to schematic diagram above, disassemble as follows:
This PDF gives you everything you need to know about installing, maintaining and servicing your Pivot Pegz. The PDF also includes a schematic diagram and step-by-step instructions on how to dis-assemble and reassemble Pivot Pegz.
- 1Wear eye protection
- 2Remove the 17mm Lock Nut(1)
- 3Remove Washer(2) that was under Lock Nut(1)
- 4Carefully grip the Peg Body(5) and slide it off Mount Assembly(7) Pivot Shaft. IMPORTANT - Be careful that the Pivot Spring(6) does not fly off the back of Peg Body(5) when you remove the Peg Body(5) from the Pivot Shaft(6).
- 5Clean & inspect the Peg Body(5) and Mount Assemble(7) and all other parts and renew/replace any worn parts.
Referring to schematic diagram, disassemble as follows:
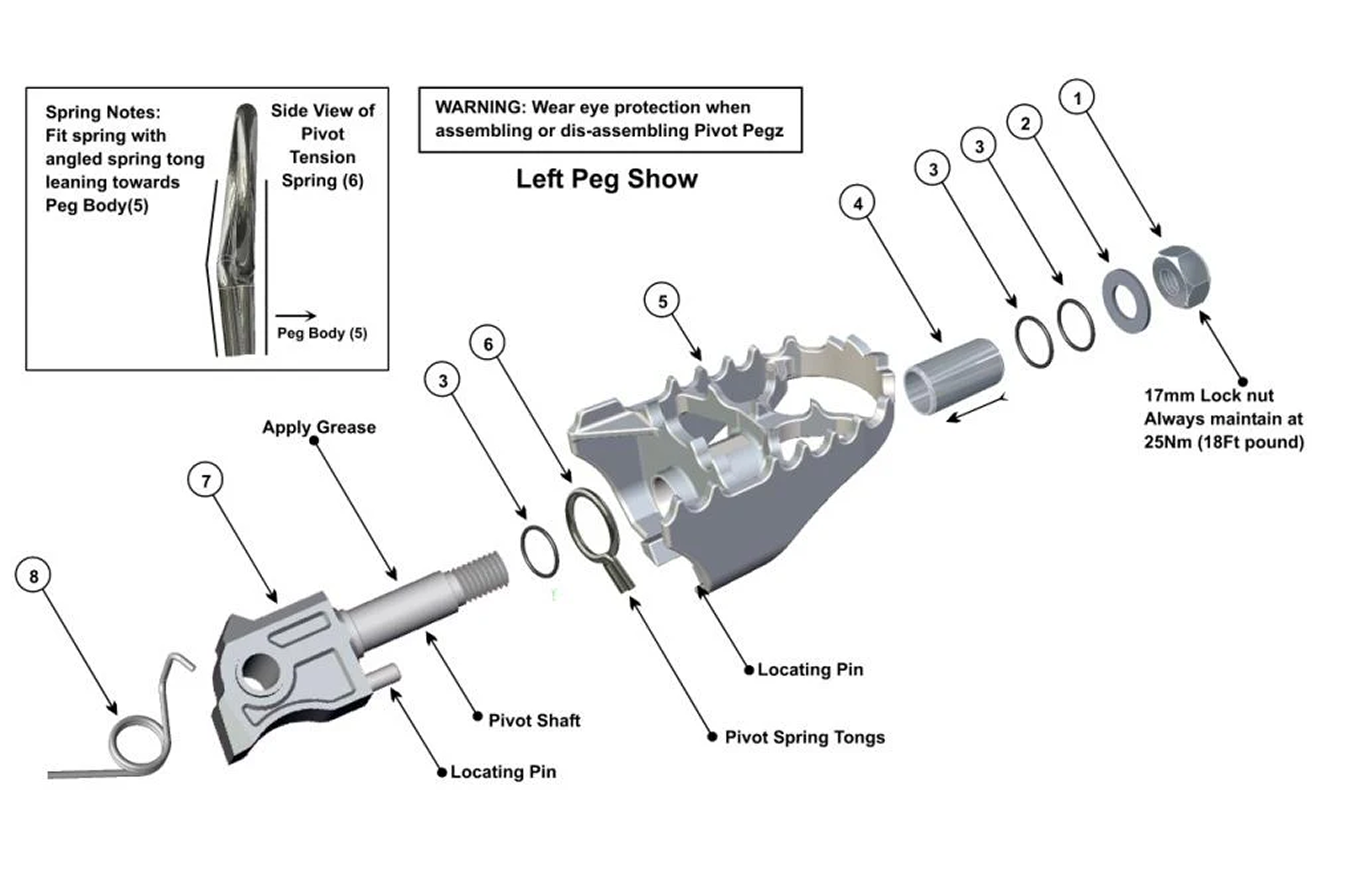
- 01Lightly lubricate all O-Rings(3) with high quality extreme pressure (EP) grease.
- 02Lightly lubricate the Mount Assembly(7) Pivot Shaft with extreme pressure grease.
- 03Place one O-Ring(3) over Mount Assembly(7) Pivot Shaft and slide it halfway down the shaft.
- 04Lubricate internal bushing of Peg Body(5) with high quality extreme pressure grease.
- 05Refer to Spring Notes on schematic diagram above. Position Pivot Tension Spring(6) onto the back of Peg Body(5). Make sure that the Locating Pin on the Peg Body(5) is between the tongs of the Pivot Tension Spring(6) and carefully hold spring in position for next step.
- 06Hold Pivot Tension Spring(6) in position on the Peg Body(5) and insert/slide the Mount Assembly(7) Pivot Shaft though the center of the Spring and all the way into the back of the Peg Body(5) until it stops and the thread of the Pivot Shaft protrudes out the other side of the Peg Body.
- 07Important: While inserting the Mount Assembly(7) Pivot Shaft into the back of the Peg Body(5), make sure that the Locating Pin (the dowel pin) on the Mount Assembly(7) engages between the tongs/legs of the Pivot Tension Spring(6) on the back of the Peg Body.
- 08Place two O-Rings(3) over the threaded end of the Mount Assembly(7) Pivot Shaft & position them into the recess/groove at the base of the thread.
- 09Place Washer(2) onto the Pivot Shaft thread so the Washer rests against the two O-Rings mentioned in step 8.
- 10Place Lock Nut(1) onto the thread of Mount Assembly(7) Pivot Shaft & tighten Lock Nut(1) to 25Nm (18 ft pound).